How to trade with members in the app
Find a member, pay them or request credits, and follow the trade in Activity.

Haven't set up your profile, listings and want list yet? Start with your first trade. This post covers the trade itself: finding a member, paying, confirming, getting paid and fixing a problem.
1. Find a member
There are a few ways in:
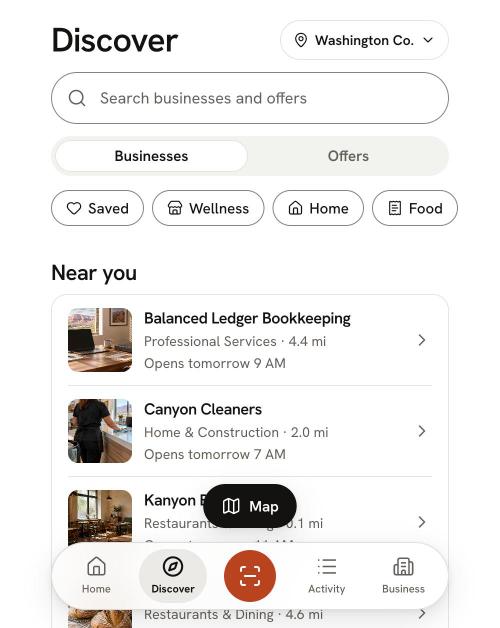
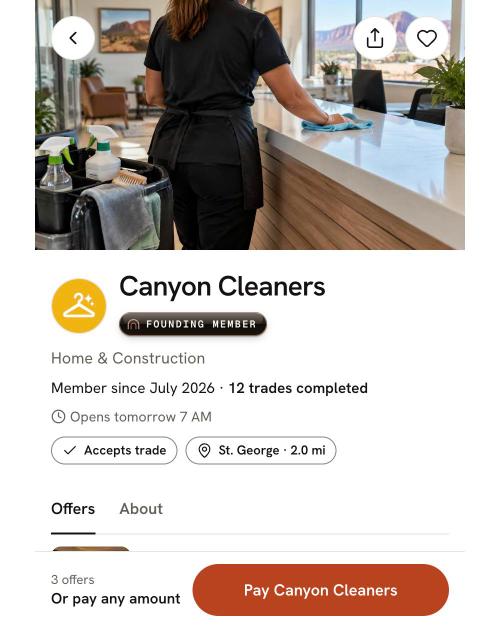
- Discover. Search businesses and offers, or switch between Businesses and Offers. Each business shows whether it's accepting trade.
- The map. Tap Map in Discover to see members near you. Rust pins are things on your want list. Tap List to go back.
- Your want list. Open Want list from the Business tab and tap an item to search members who offer it.
- Search to pay. If you already know who you're paying, skip ahead to step 2.
2. Pay them
- 1Tap Pay. On a phone it opens Scan to pay. Point your camera at the member's code on their counter or phone. It scans on its own.
- 2No code handy? Use Pay a member instead: search for the business, choose a recent payee, or paste their pay link.
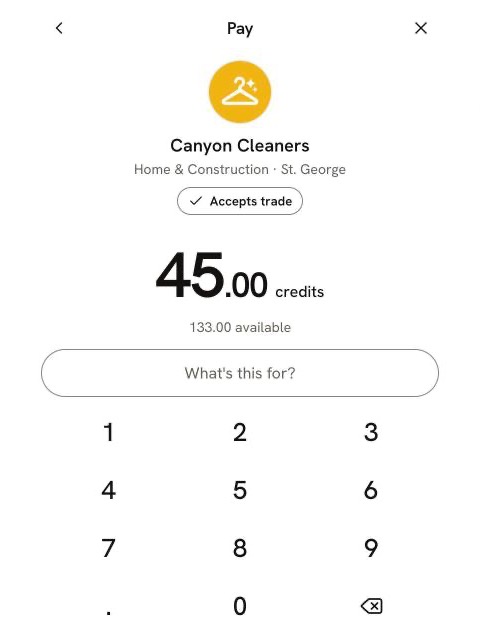
- 3Enter the amount and what it's for, then tap Review.
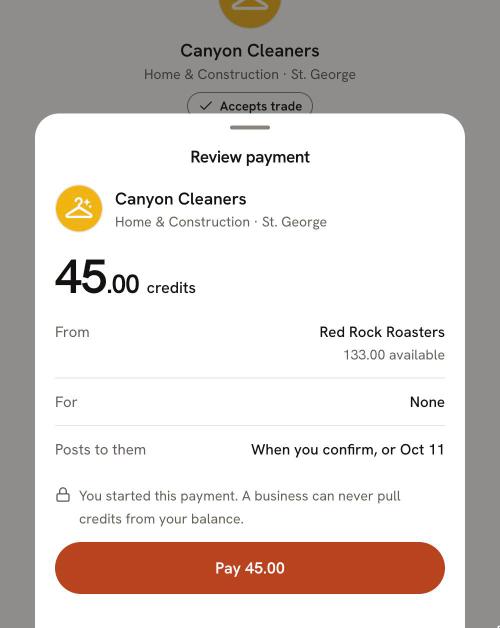
- 4Check the Review payment sheet: who you're paying, the amount and what it's for. Then tap Pay.
You start every payment. A business can never pull credits from your balance.
3. What happens next
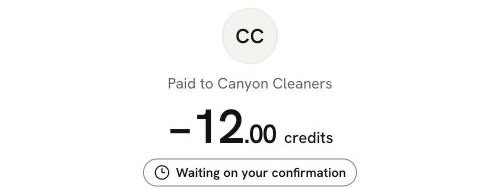
The credits leave your balance right away, and the receipt shows Waiting on your confirmation. They don't reach the seller yet. They post to the seller when you confirm the trade, or on their own after a set number of days. The receipt shows the date.
4. Confirm the trade
Once you have what you paid for, tap Confirm it's done. You'll find it on the receipt, on the trade itself, and in Activity under trades that need you. Confirming posts the credits to the seller now.
Paid for something that happens later, like an appointment next week? Confirm after it's done.
5. Get paid yourself
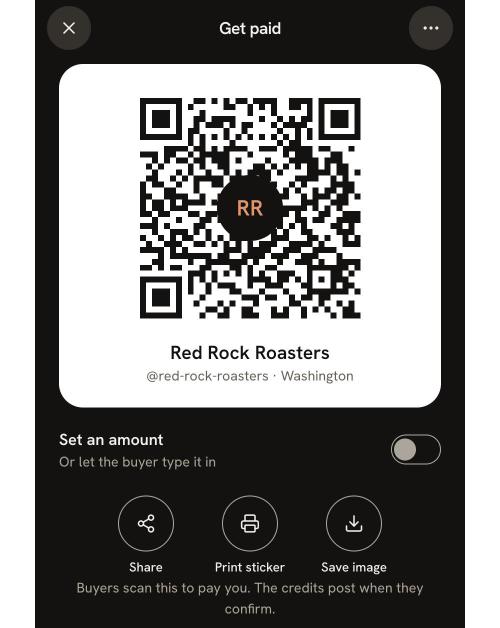
- Show your code. Open Get paid. Buyers scan it to pay you, and the credits post when they confirm. You can set an amount first, print a counter sticker, or share your pay link.
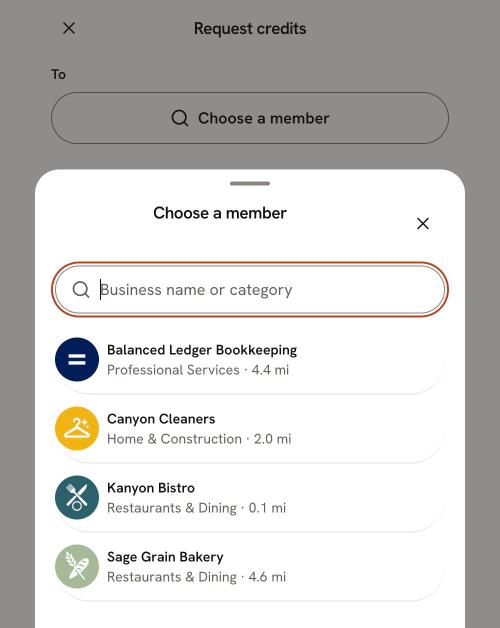
- Send a request. Open Request credits, choose the member, set the amount and say what it's for. The buyer approves it before anything moves.
- Recurring requests. For regular work, turn on Recurring request and choose weekly or monthly. The buyer approves the first one and can choose to pay the next ones automatically. You can see and manage them under Recurring on the Business tab.
6. See it in Activity
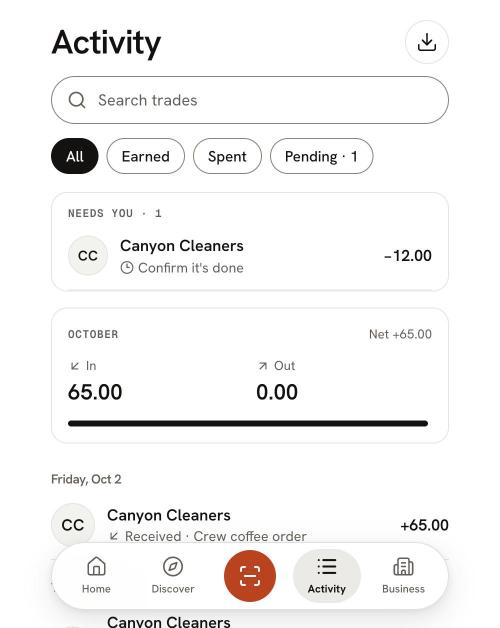
Activity lists every trade, pending and posted. Filter for the ones that need you, search your trades, and pick a month. You can open Statements or download a CSV for your books.
7. If something's wrong, report it from the trade
Open the trade and tap Report a problem. Pick what went wrong, such as "They didn't show up" or "Quality wasn't as described," and add a short note. The credits stay pending while the team looks into it, and both businesses hear what happens next.
Problems with a trade go through Report a problem, not chat. Use Ask us about this trade for questions that aren't a dispute. Report a problem within 30 days of the trade; after that, message us instead.
8. Trading area on your plan
Your plan covers a trading area. Businesses outside it show Outside your area in Discover. If you try to pay one, the app explains that the business is outside your trading area, shows which counties your plan covers, and offers the plan that would include it. Until then, that payment can't go through.
Ready to start?
New to Red Rock Trade? Get started. Want the basics first? Read how credits work.
Trade with businesses near you.
Every new member starts with 100 welcome credits to spend with any member. It’s a gift, not a loan, so you never owe it back.